Setup Guide
What's in the Box
- SANDER USB touch bridge
- USB cable
First-Time Setup
1. Connect to SANDER's WiFi
When powered on for the first time (or after a factory reset), SANDER creates a WiFi access point named SANDER-XXXX (where XXXX is unique to your device).
Connect to this network from a phone, tablet, or laptop. A configuration portal will open automatically.
2. Configure WiFi
In the configuration portal, enter your network credentials:
- WiFi network name (SSID) — the network your MultiTaction display is connected to
- WiFi password
SANDER will save the credentials and connect to your network.
3. Configure Touch Source
Enter the connection details for your MultiTaction display:
- Host — the IP address or hostname of your MultiTaction display
- Port — the NetBridge port (default: 5502)
4. Connect to Host Machine
Plug the USB cable into the host machine you want to control. The host will detect SANDER as a standard USB touchscreen and pen input device — no drivers or software installation needed.
5. Verify
The LED indicator shows the connection state:
| LED Colour | Meaning |
|---|---|
| Red pulsing | Not connected to WiFi — check WiFi credentials |
| Yellow solid | WiFi connected but not receiving touch data — check touch source settings |
| Green solid | Working — touches are being relayed |
| Blue flash | Touch event sent to host |
Web Dashboard
Once SANDER is connected to your WiFi network, you can access its web dashboard from any browser on the same network. Navigate to SANDER's IP address (shown during initial setup, or find it in your router's DHCP client list).
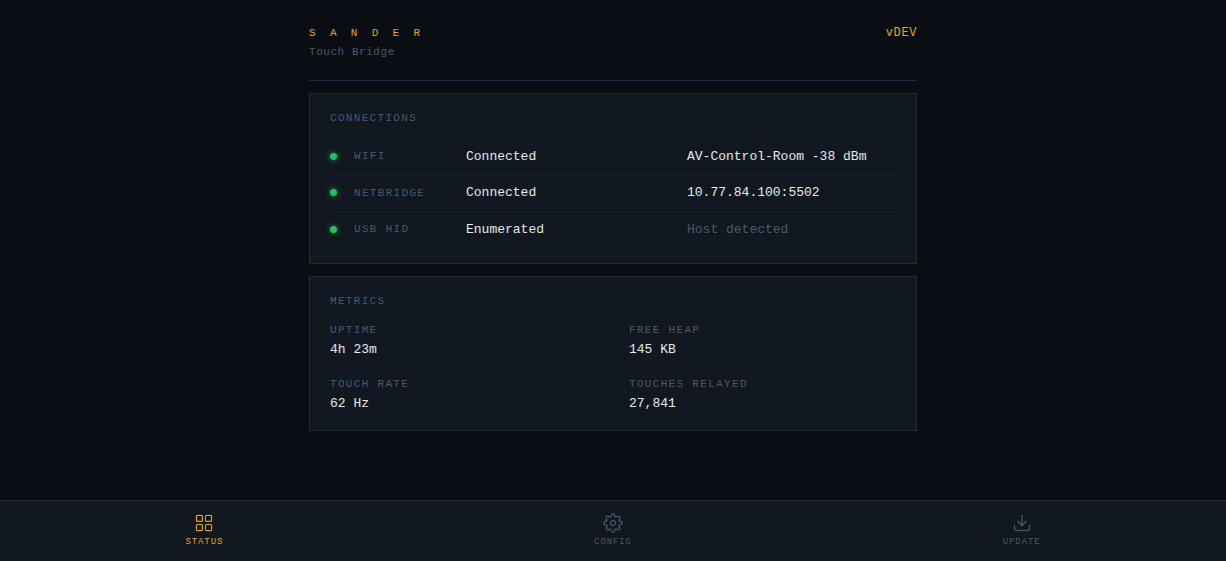
Status
The status page shows connection state, uptime, and touch statistics at a glance.
Configuration
The configuration page has expandable sections for WiFi, NetBridge source, coordinate transforms, eraser markers, and device settings.
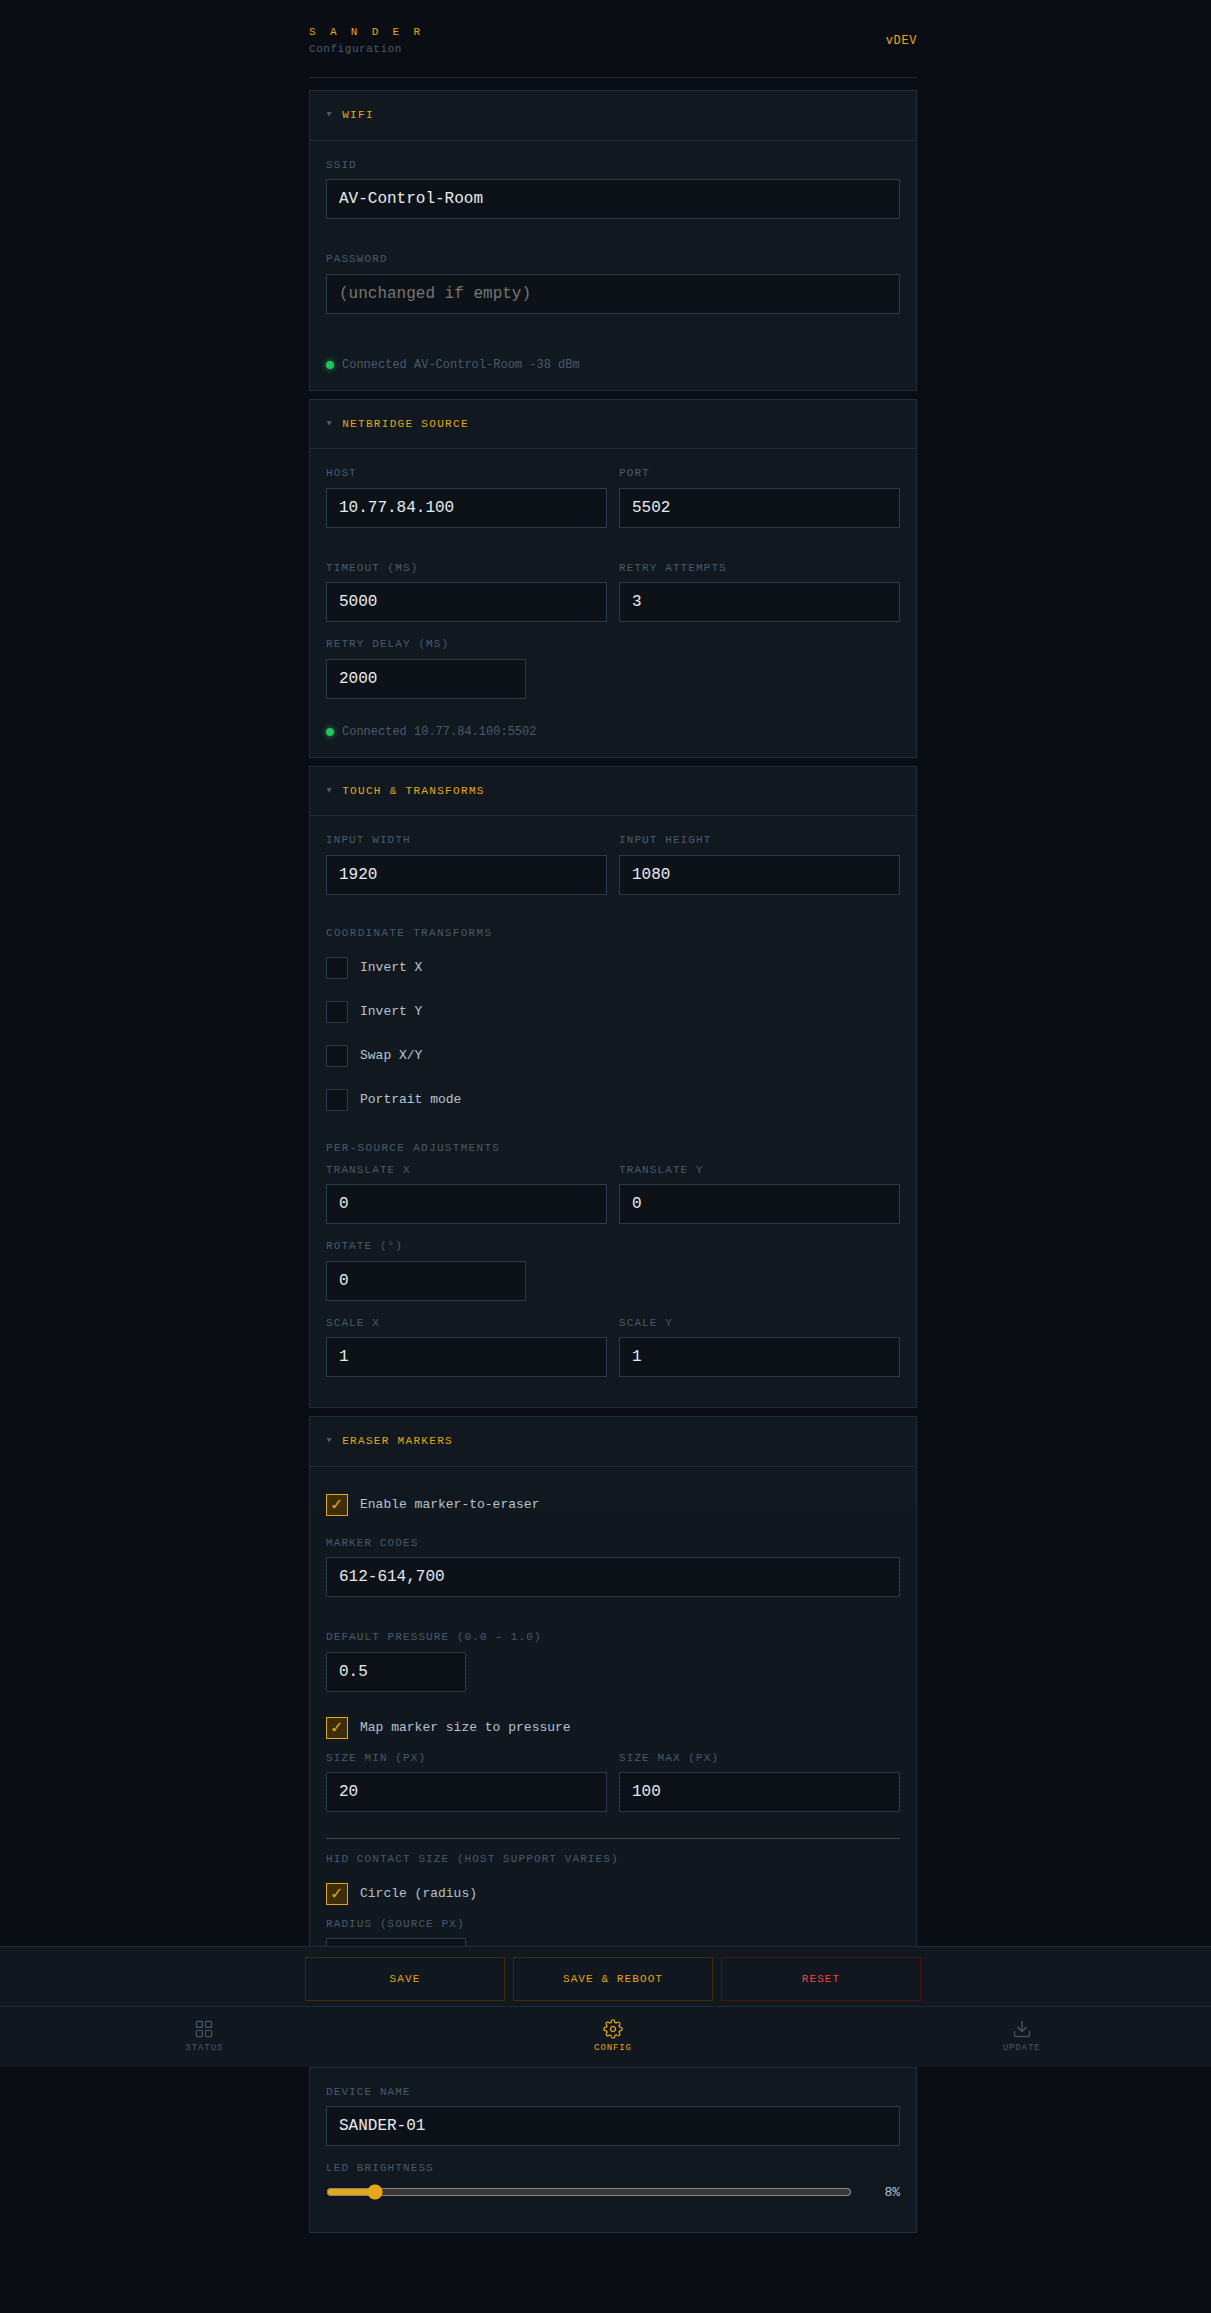
Eraser Contact Size (HID)
The configuration page includes an optional HID contact size setting that controls the reported eraser contact area to the host computer. This affects eraser behavior in Windows Ink-aware applications.
Two contact size shapes are supported:
- Circle — specify a radius in source pixels
- Rectangle — specify width and height in source pixels
Enable "Report contact size via HID" in the eraser configuration section and select the shape and size that best matches your eraser tool.
Note
Host support for HID contact size varies. Windows Ink applications may use this information for eraser brush size. The feature has no effect on hosts that do not support HID Width/Height digitizer usages.
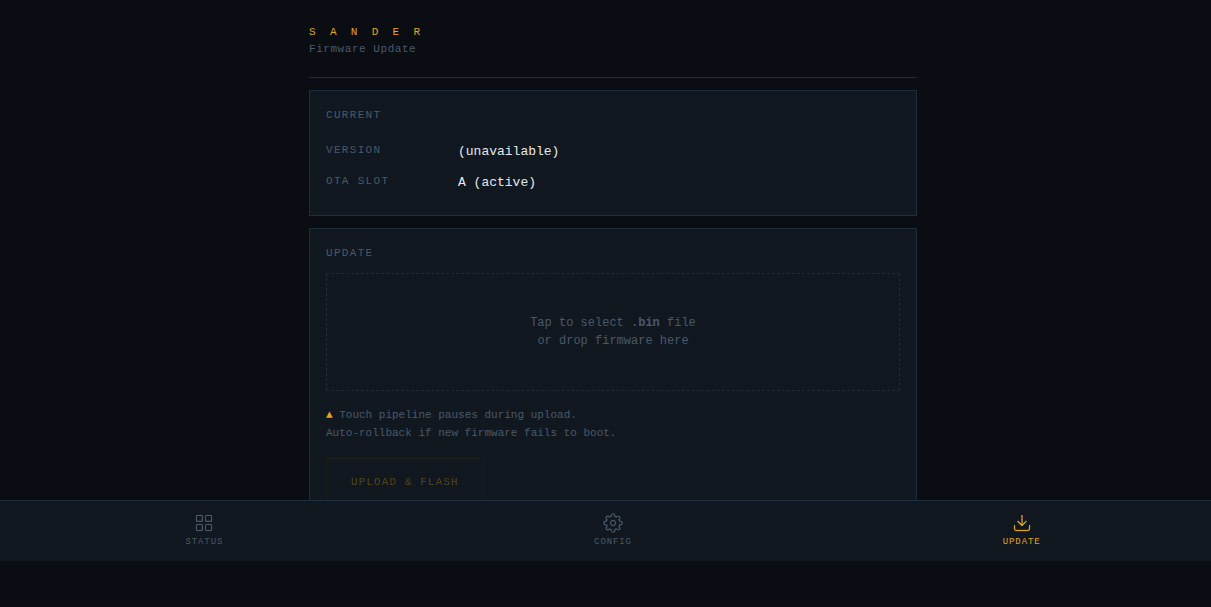
Firmware Update
Upload new firmware directly from your browser. SANDER uses dual OTA partitions — if an update fails, it automatically rolls back to the previous working version.
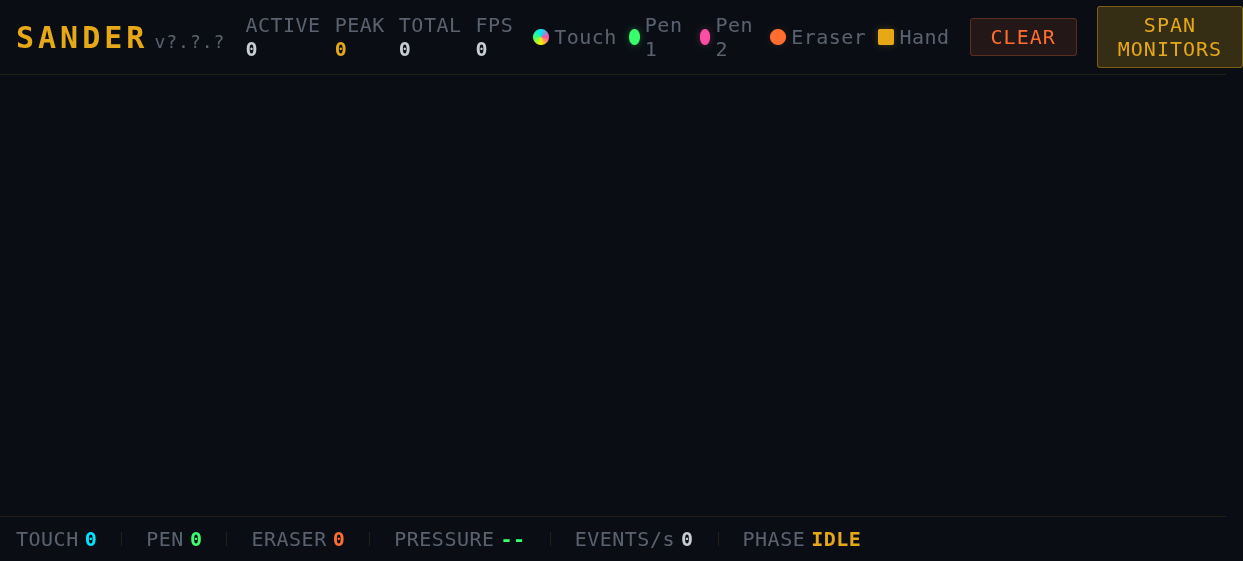
Touch Diagnostics
The built-in touch tracer visualises touch, pen, and eraser input in real time — useful for on-site testing and verifying coordinate alignment.
Static IP Configuration
By default, SANDER obtains its IP address automatically via DHCP. For deployments that require a fixed address — such as AV control rooms, firewall rules, or network documentation — you can assign a static IP instead.
To configure a static IP:
- Open the SANDER web interface and navigate to Config
- In the WiFi section, under Network, check Use static IP
- Enter the IP Address, Gateway, and Subnet Mask for your network
- Click Save & Reboot
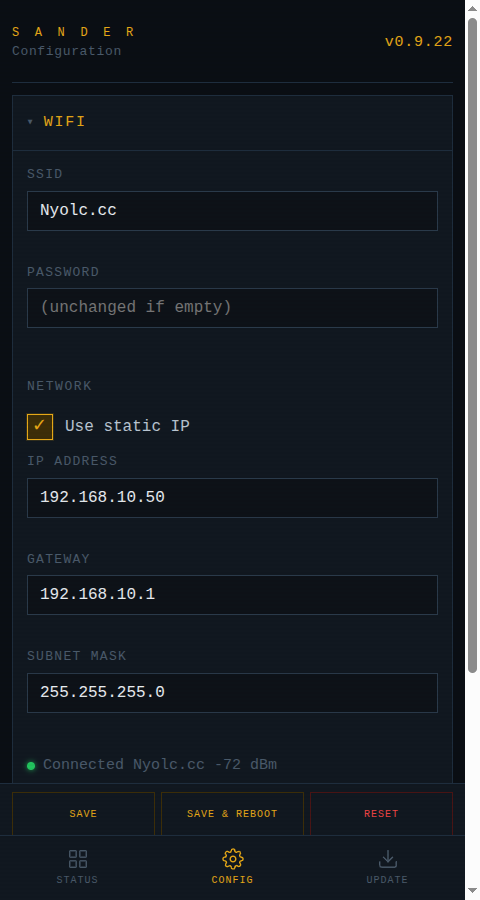
After rebooting, SANDER will use the configured static IP. If the static IP cannot be applied (e.g. invalid address), the device falls back to DHCP automatically.
To return to DHCP, uncheck Use static IP and save. A factory reset also clears all static IP settings.
Note
There is no DNS field. SANDER connects to the NetBridge source by IP address, so DNS resolution is not required.
Coordinate Transforms
If the touch coordinates don't align with the display output, adjust the coordinate transforms in the configuration page:
- Invert X / Invert Y — mirror the touch coordinates
- Swap axes — swap X and Y (useful for portrait mode)
- Rotate — rotate the coordinate space
- Translate / Scale — offset and scale the coordinates to match the display area
Reflashing
If SANDER becomes unresponsive or you need to perform a full reflash, see the SANDER Reflash Tool for instructions and firmware images.